Archive | Pastries RSS feed for this section

Eggnog Blondies with Brandy Spiked Eggnog Buttercream

13 Dec

Is Christmas really just 12 days away?!  Holy holly berries…I don’t know about you, but I’m pretty excited!

Tree up and decorated?!  Probably not.

Halls decked & stockings hung by the chimney with care?  Ummm, not quite.

Presents wrapped & ready to go?  Uhhh….

Alright alright, despite having just about nothing done in preparation for Christmas,  I’d definitely say I’m in the spirit, though!

I’ve got a list and I’m in the process of checking it twice.

And seriously, the holiday baking?  Totally!  Plus, check out this cute red ramekin I received as a birthday gift from my momma! 😀

The eggnog craze continues.  I promise the next recipe I post will contain neither egg nor nog, for fear of losing all of you out there who expect festive holiday flavor variety.  I get it, I really do.  It’s just that once I get inspired by a flavor, the wheels start turning and basically end up bull-dozing every other flavor in site.  Bear with me for the time being, or if you are a die-hard eggnog lover like myself, enjoy the ride while it lasts!


These blondies are a perfect blend of cookie and cake…the melding of a brownie and, well, not a brownie. Obviously there’s frosting. Not just any frosting, though, this stuff has got a little kick to it, while still being alcohol-shy friendly. I recently read an article reviewing which particular type of alcohol makes for the best-tasting eggnog.  The contenders were Brandy, Rum, and Whiskey, and since Brandy came out on top, that’s what I decided to use, obviously!  To be fair, you really can’t detect the Brandy in it much, so if you feel compelled, maybe pour yourself a glass of spiked nog to go with them? It’s just a suggestion, I mean, there are a lot of holiday gatherings to get through!

Super simple to mix up and throw in a pan to bake without the hassle of sheet after sheet of cookie balling and baking…swipe on a little frosting once they’ve cooled, and voila!…And really, who couldn’t use a time-saving recipe during the holidays, am I right? Maybe if I’d had more of these cookie cake bar blondies in my life I’d have a tree by now, and maybe even gifts under it? Whoa, whoa, I’m not THAT on top of it!

Eggnog Blondies with Brandy Spiked Eggnog Buttercream

Ingredients:

For the Bars-
* 3 Cups All-purpose Flour
* 1 tsp Baking Soda
* 1 tsp salt
* 1 tsp nutmeg (I didn’t have it at the time, but would have added this!)
* 3/4 Cup Butter-flavored Shortening
* 3/4 Cup Brown Sugar, packed
* 1/2 Cup Granulated Sugar
* 1/2 Cup Eggnog, any type
* 2 Large Eggs
* 1 tsp Brandy or Rum (If you don’t want to use alcohol, or don’t have any on hand, Vanilla extract would work)

For the Buttercream-
* 3 Cups Confectioners Sugar
* Dash of Salt
* 7 Tbsp Margarine or Unsalted Butter
* 3 tsp Eggnog
* 2 tsp Brandy or Rum (Again, if you want to make this whole shebang non-alcoholic, just use Vanilla extract or more eggnog instead)
* 1 tsp Ground Nutmeg
* Clear crystal Sprinkles (Optional, (but not really!) for topping)
* Red & Green Holiday Sprinkles (Optional, (but not really!) for topping)

Directions:

Preheat oven to 350*F. Line a 9 x 13″ pan with parchment paper, if you have it.

Cream together the shortening, brown sugar and white sugar in the bowl of a stand mixer (or by hand!). Beat in the eggnog, eggs one at a time, and the brandy or rum.

Sift together the flour, baking soda, and salt in a separate bowl. Slowly add the dry ingredients to the wet mixture, mixing between additions.

Pour batter into prepared pan and bake for 15 minutes. Check for browning on top after 15 minutes, and cover with foil if it’s getting too brown. Bake another 5-8 minutes, depending on your oven (Mine took 23 minutes). Pull out of oven and allow to cool in the pan.

For the frosting, cream the margarine or butter in the bowl of a stand mixer. Gradually add in about 2 cups of the confectioners sugar and the salt. You’ll get a pebbly grainy texture, which is fine. Add 2 tsp of eggnog and continue mixing. Add in the last 1 tsp of eggnog, and then add in the remaining 1 cup of confectioners sugar. Mix in the 2 tsp of Brandy or Rum. Depending on how thick or thin you like your buttercream, you can add a little more confectioners sugar if you think it’s too thin, or a little more Brandy and/or eggnog if you think it’s too thick. Mix in the ground nutmeg.

Allow blondies to fully cool before slicing into squares while in the pan, and then spreading on the frosting. Top with holiday sprinkles!

I’d love to hear what others have to say about alcohol choice in their eggnog!  Which do you prefer?  I feel like Rum is the most traditional, but I’m not exactly sure where that feeling is coming from, especially since at the drop of a hat I totally went with the reviewer’s suggestion and used Brandy in these bars instead!  To each their own?  Everyone’s different.

Serve. Eat. Repeat!


Happy Holidays!

Classic Pumpkin Pie

26 Nov

If the last thing you want to see right now is a pumpkin pie, and the last thing you want to to do right now is follow a pumpkin pie recipe to make a pie…then turn away now!


If you’re still on board with the whole make more pie since the pie from Thanksgiving was so amazing idea, however, then you’ve come to the right place!

As I mentioned before in my Thanksgiving Recap, pie was abundant, but didn’t include much in the way of pumpkin until the next morning.  My brother’s fiancee, Becky, is obviously pretty die hard, even during the holidays- she had to go in to work on Black Friday, while most of the rest of the world was either fighting off crowds at Best Buy, or continuing to digest Thanksgiving dinner from the night before.  Before she left, though, she whipped up this classic pumpkin pie!
There’s nothing much new about this particular pumpkin pie since the filling is the result of the tried and true Libby’s recipe on the back of the pumpkin puree cans, but a pie is always set apart by its crust, which she made from scratch.  It was basically a hit, so here it is!

Libby’s Classic Pumpkin Pie

This recipe is for one pie, with a single, bottom crust.  The recipe on the Libby’s canned pumpkin is for 2 pies.
Probably one of the simplest of all pies, but always a Thanksgiving favorite, for sure!  I bet if you’re a pumpkin purist you could use your own stewed pumpkin, or you could probably use this recipe with canned butternut squash or sweet potato puree even, if that’s what you have on hand!

Ingredients:

* 3/4 Cup Sugar
* 1/2 tsp Salt
* 1 tsp Ground Cinnamon
* 1/2 tsp Ground Ginger
* 1/4 tsp Ground Cloves
* 2 Large Eggs
* 1/2 of a 29 oz can of Libby’s Canned Pumpkin
* 1 Can Evaporated Milk
* 1 Store bought, or Homemade pie crust (see below for crust ingredients + how-to)

Directions:

Preheat oven to 425*F.

For the crust-

1.5 cups flour, 1/2 tsp salt, 1/4 cup shortening, 1/4 cup butter and 2-4 tbsp of cold water.

Mix flour and salt, blend in the fats with a pastry cutter, then add water until the dough just forms a ball (don’t add too much H20 and don’t overwork the dough once the water is in. Otherwise the pie crust will be tough.)  Roll out the dough on a floured surface until slightly larger than the size of your pie pan.  An easy way to transfer the dough to the pan is to roll it up on your rolling pin, lift it up, and unroll it over the pan- voila!  Now use your fingers to crimp the edges and make it pretty (or if it’s not quite perfect, do what I do and call it rustic 😉

For the Filling-

Mix sugar, salt, cinnamon, ginger, and cloves in a small bowl.
Beat eggs together in a separate bowl, and stir in the pumpkin and sugar and spice mixture.
Slowly stir in the evaporated milk.

Pour into your pie shell, and bake for 15 minutes. Reduce the temperature to 350*F and bake for another 40-50 minutes or until a knife inserted near the center comes out clean.
Cool on a wire rack thoroughly. Serve at room temperature, or refrigerate until ready to serve.

Flaky crust + custardy pumpkin = fall.  There, I said it.  Pumpkin pie doesn’t JUST have to be for Thanksgiving anymore…you can make it any time you want, I promise!

It’s actually pretty nice featuring someone else’s recipe for a change and not having to do the work…thanks, Becky!! =)

…Any chance I can get guest posts out of anyone else?!  Just asking 😉

Cookies & Kitchen Sabotage

10 Oct

Let me start off by saying that some of my very best baking work is the baking work that just doesn’t end up on the blog.  Most likely, I think it’s because they’re the recipes I make all of the time, over and over as favorites and stand-bys; they rarely let me down.  And yet, they never seem quite impressive or novel enough to feature.  Upon typing that, I realize it’s just not fair.  At all.  Afterall, recipes like basic, delicious, chocolate chip cookies are always a crowd pleaser, and clearly deserve their 15 minutes!

Now, remember that time I said these recipes rarely let me down?  Well, they don’t.  But sometimes other kitchen nightmares get me a little disenchanted.  It’s really not the recipe’s fault at all.

This particular cookie story begins with the best of intentions, is wrought with untimely tragedy, and wraps up with a happy ending.  Sort of.

If you’ve never broiled a cookie, I envy you. I wish I could say the same.  Trust me, it’s not only NOT the way to go, it’s also not the type of situation you walk into the kitchen and expect to get yourself into.  Or to have someone else get you into, as the case may be.  That’s precisely where the kitchen sabotage portion of this story comes in to play.  Once again, I won’t name names (but it was my brother).  I wouldn’t want to throw anyone under the bus (but it was my brother).  I’m not that kind of person to just hold a grudge (but it was my brother).  So anyway, whatever happened, my brother happened to be BROILING peppers pre-cookie baking, so I bounded into the kitchen (GOOD INTENTIONS), expecting a smooth-sailing kind of cookie baking experience, only to pull the first pan of cookies out of the oven and find not the type of golden brown color you might want in a cookie.  Obviously I had adjusted the temperature, but had no idea there had been broiling going on, and that it was apparently still going on. (TRAGEDY!)

Needless to say, it took quite a few pans of cookies for the oven to reach optimal cookie baking temperature, even after settings were adjusted.  I don’t want to harp on it or anything (but it was my brother), so I guess I’m just going to maturely let it go.

The cookies you see here are the very. last. pan of cookies.  Not even a full pan.  Oh well, at least I got them, right?! (HAPPY ENDING…sort of?)

Chocolate Chip Pecan Cookies
I know this cookie recipe by heart. I make it often, you could say. It’s simple, and perfect for changing up the add-ins, depending on what you’re in the mood for.

Ingredients:

* 1 cup butter flavored shortening
* 1 cup packed brown sugar
* 1/2 cup white sugar
* 2 eggs
* 1 tsp vanilla extract
* 2 1/4 cups flour
* 1 tsp baking soda
* 1 tsp salt
* 1 cup semi-sweet chocolate chips.
* 1 cup roughly chopped pecans (or any other nut you like, really)

Directions:

Preheat oven to 350* F. Line a cookie sheet with parchment paper or a silpat.

Cream together the shortening and sugars in a mixer, or by hand. Add the 2 eggs, mixing between additions. Add the vanilla and mix.

In a separate bowl, sift together the flour, salt, and baking soda.

Slowly add the flour mixture in intervals until well-incorporated. Make sure you scrape down the sides of the bowl as you go.

Stir in the chocolate chips and pecans by hand. Use a cookie scoop (the metal ice cream scooper looking things) to place 8 cookie blobs on your pan at a time (depending on the size of your cookie sheet).

Bake about 11 minutes. Let cool on the pan for about 5 minutes before transferring to a cooling rack….or just eating. I’d hate to be on the receiving end of angry emails from burnt-mouth readers who didn’t follow that step! 🙂

I’m not going to name names, yet again, but these cookies have been called the single greatest chocolate chip cookie ever (by my brother).  You should probably bake them (but not broil them!) (HAPPY ENDING!)

Strawberry Nectarine Oat Squares

26 Aug

There are so manya fewone or two…ok, there’s one good thing about the quarter system, and that’s the fact that while all the other kiddies are wrapping up their endless days of summer and getting ready to ship off back to school, there’s still another month before our fall quarter starts.

HOWEVER,…and that’s a big-time HOWEVER, I love the “back to school” fever that seems to infect students and moms alike, spurring sales on school supplies & shelves stocked with fall clothes, and by the time I’m actually supposed to be doing my “back to schooling,” the hype is all hyped out, the sales are done salesing, and all the good fall clothes are all tapped out.

I think the fact that I haven’t actually had a summer break and have been attending classes basically non-stop since Christmas break of 2010 is completely irrelevant in this situation, too, so let’s not bring that up. Just because I haven’t gotten my fix of bright, summery fun, carefree, class free summer days filled with the beach, boys, and iced coffee doesn’t mean I can’t lament the fact that summer will soon be coming to an end, and then self medicate that loss with a hefty dose of hope that back to school is truly more about good times with friends at football games and frat parties rather than hours of mind-numbing, soul crushing classwork. That’s what all the magazines and ads say, anyway.

So anyway, the moral of this babbling is, I want the “back to school” time of year to last longer. Ya, maybe stretch those sales out til say, the end of September? I wanna get on that band wagon when that time actually comes for us quarter system kiddies (not to mention us Californians, who dread the thought of cool weather clothing well into October), and not a moment sooner…because obviously, I don’t want summer to end at all, EVER! But, if it has to, it should end in crisp, cool weather, new school supplies, fluffy sweaters, pumpkin spice lattes, tailgate parties, and all the hype that everyone else gets to embrace when the summer gravy train departs until next year.

The other moral of the story is, make these yummy strawberry nectarine oat-y bars for busy, get the kids or yourself out the door mornings! They’re like strawberry topped oatmeal on the go =)

Strawberry Nectarine Oat Squares
Adapted from Oh She Glows

Ingredients:

Base:
* 1 1/2 Cups Oats
* 1 Cup Whole Wheat Flour (I needed to add about 1/2 cup more to get a thick enough “dough”)
* 1/2 tsp Baking Soda
* 1/2 tsp Salt
* 1/2 Cup Brown Sugar
* 1 Egg
* 1/2 Cup + 2 Tbsp Margarine, melted
* 1/4 Cup Maple Syrup
* 2 Tbsp Almond Milk
* 1 Tbsp Sesame Seeds to sprinkle on top

Strawberry Nectarine Jam:
* 2 1/4 Cups Chopped Strawberry & Nectarine (Any ratio is fine- I used 1 nectarine and the rest strawberry)
* 3-4 Tbsp Sugar
* 1 Tbsp Cornstarch

Directions:
Preheat oven to 350*F. Grease or line an 8 x 8″ pan.

For the oat base, combine the oats, flour, baking soda, salt, and brown sugar in a mixing bowl.

Combine the melted margarine, maple syrup, almond milk, and egg in a separate bowl.

Add the wet mixture to the dry oat mixture, and stir to combine. You should get a pretty thick “dough”…if it seems too wet, add in a little extra flour, or more oats, or both until you get the right consistency.

Reserve 1/2 cup of the oat dough and set it aside. Press the dough evenly into the bottom of your pan.

Add your strawberry and nectarine mixture into a saucepan and heat on low for about 5 minutes. Add the sugar slowly, to taste. Heat for another 5 minutes until the mixture is juicy- use a spoon to pull out a few teaspoons of the juice in a mug or small bowl. Stir in the cornstarch. Add the juice and cornstarch mixture to the saucepan and simmer on low for about 10 more minutes, or until the jam thickens up. Take off heat and let cool for about 10 minutes.

Pour the jam on top of the oat base and spread evenly. Crumble the 1/2 cup of oat dough you reserved on top of the jam. Sprinkle with Sesame seeds.

Bake for 25-30 minutes, depending on how hot your oven gets. Allow to cool for 30 minutes before slicing.

For now, I think I’ll call these “back to summer school bars.” The calm before the fall!

Candied Ginger Bars

21 Aug

As it turns out, it didn’t actually hit me until today that I am really moving.  For whatever reason, the last several weeks of gathering boxes, stressing, and packing weren’t enough to get me thinking about what all of it really means until now.

Most of the times I have moved in the past (there have been A LOT of those times), I knew exactly where I was going next.  I had time to mentally adjust and prepare to be in my new space, and that’s always pretty comforting to me.  You know, like preparing to hit the ground rather than  blindly stepping off the side of a cliff and not knowing what to expect.  It’s the same, for sure…

This time, not so much.  I don’t know what to expect or where I’ll be.  What hit me possibly the most is the limited time I have left in my tiny kitchen of two years, and the limited number of baked good items I can produce from said kitchen in that limited amount of time.  The countdown begins!
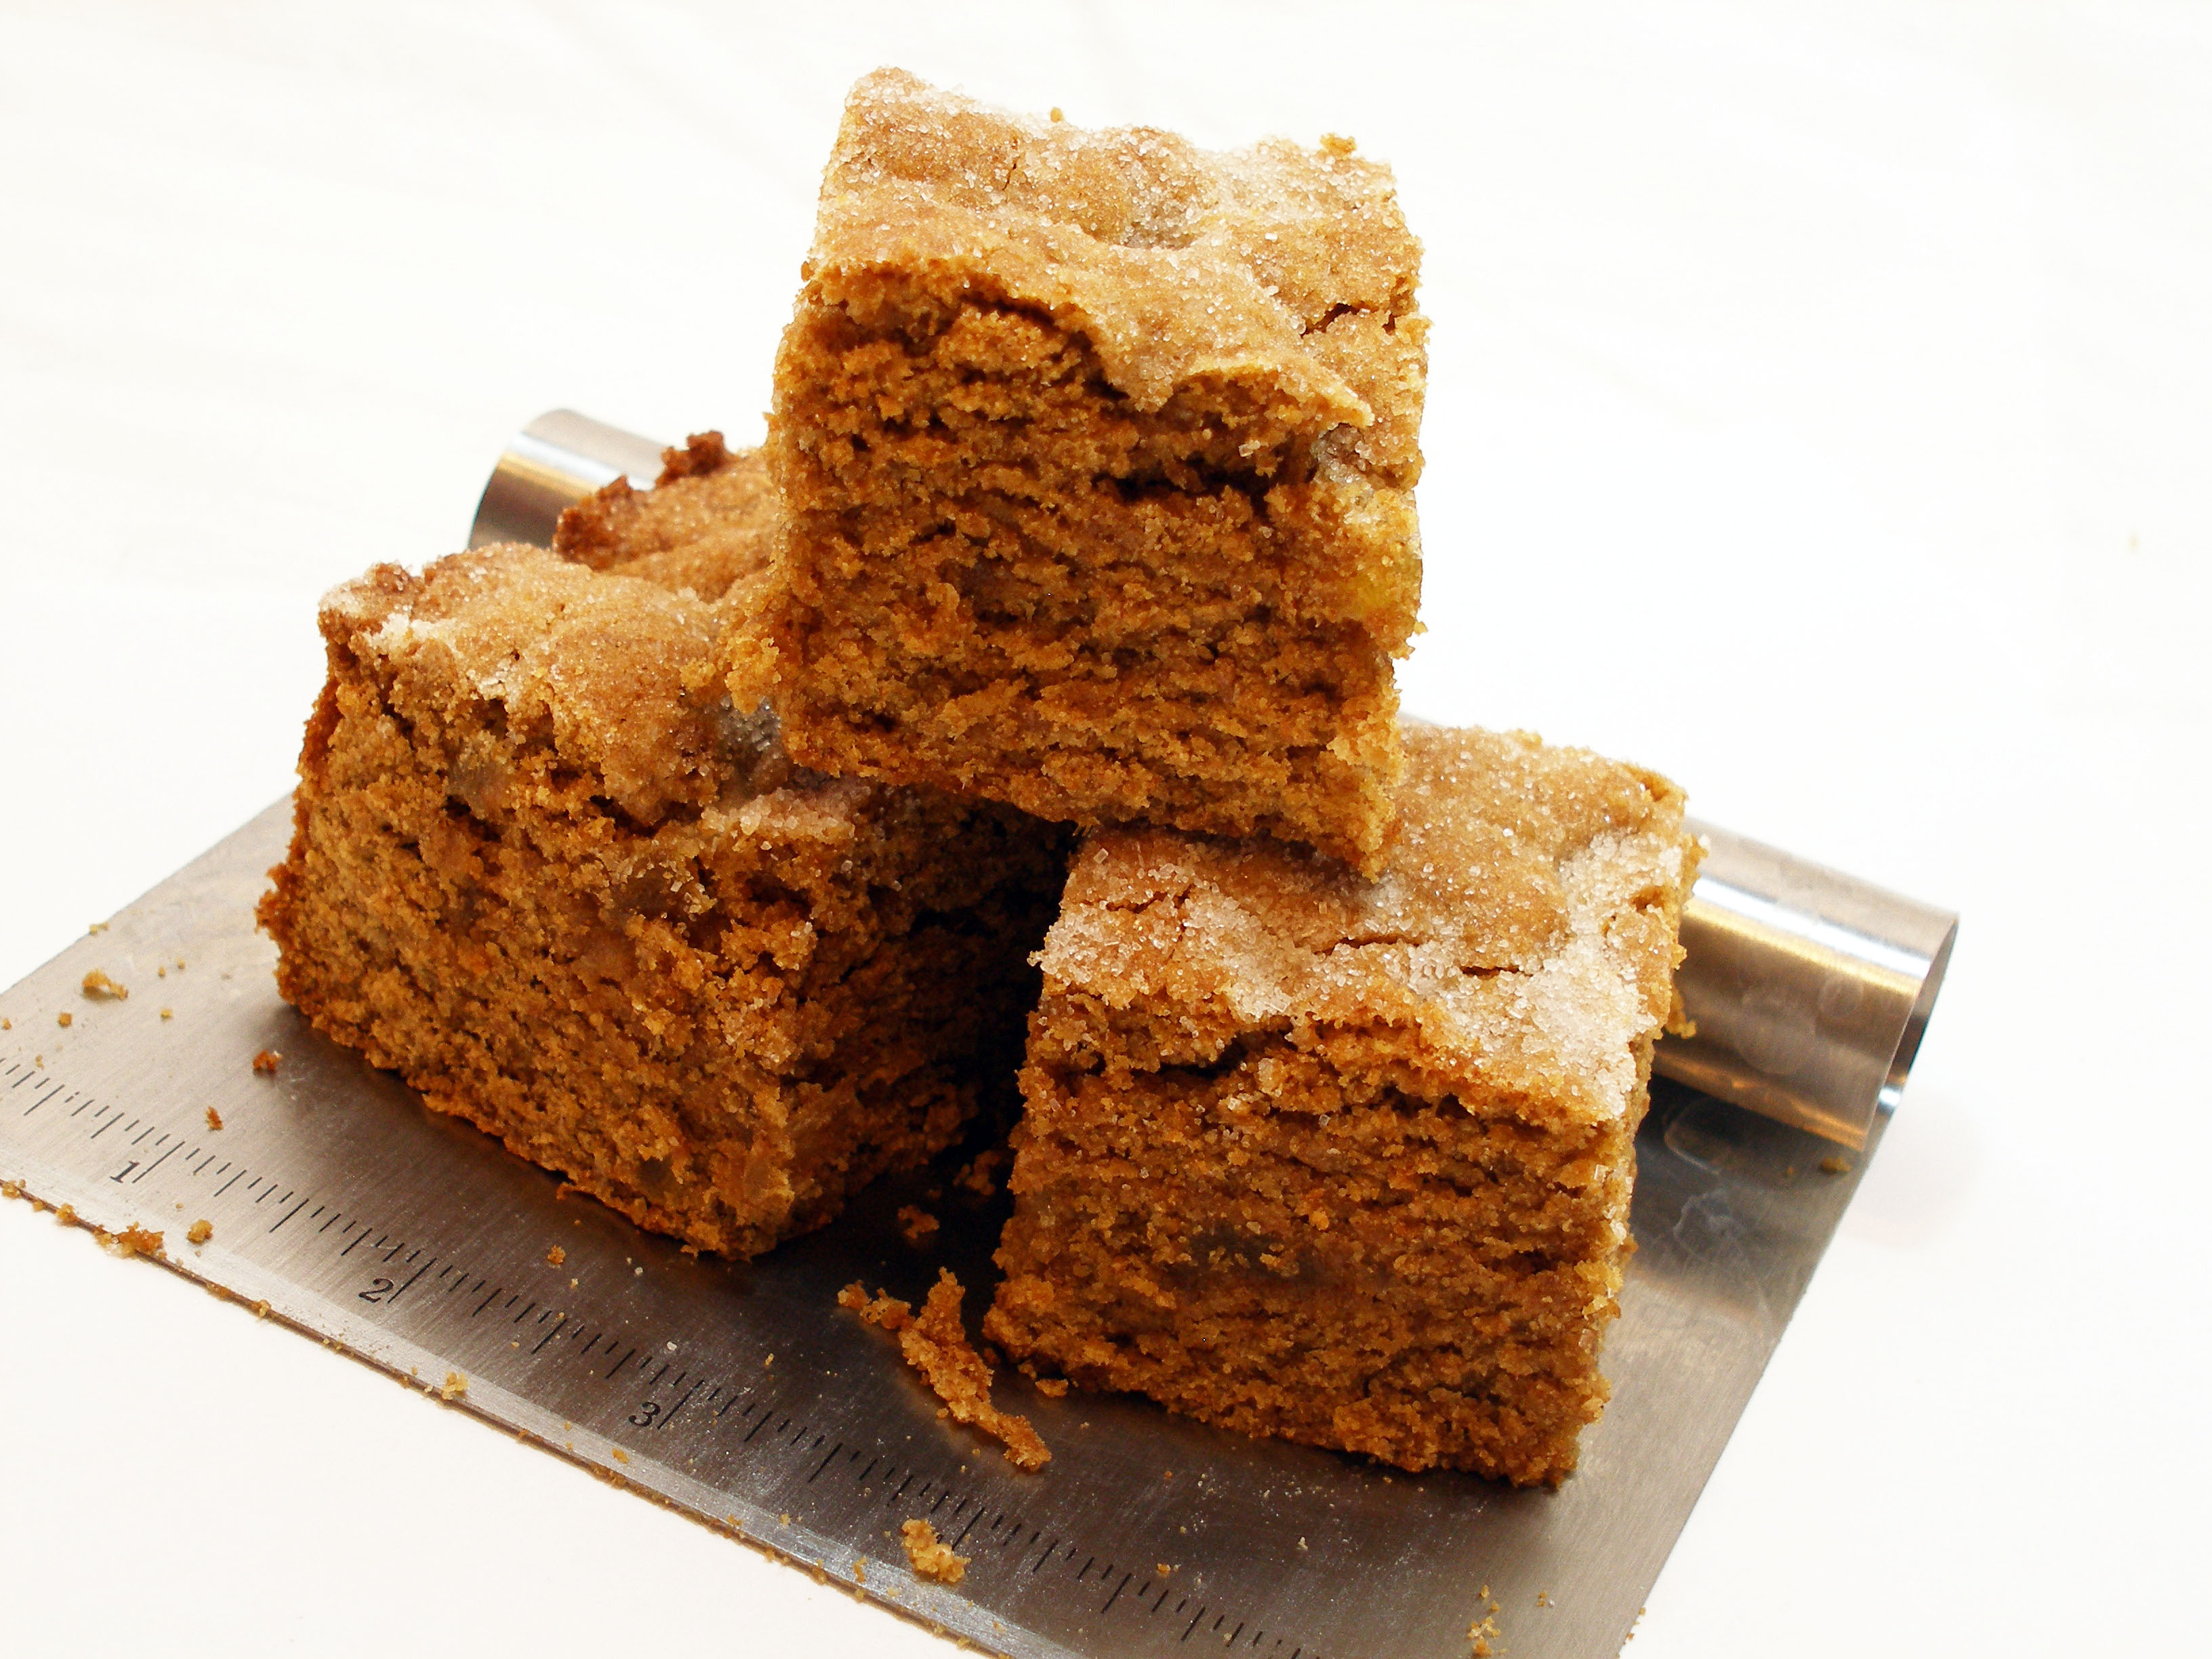
(And yes, I realize there are ridiculous-looking water spots on that cutty-thingy…haha!)

Oh, while I’m on the topic of moving, I wish I could say I have a bunch of tried and true, handy moving tips for you that make the whole process a breeze. But unfortunately, I still don’t have it all figured out, even with practically 10 moves in the last 10 years. I can tell you this, though:

DO NOT under any circumstances wait until the very last minute. I can’t tell you the number of times I’ve underestimated the amount of stuff I have, the number of boxes I’ll need, or the amount of time it will take to actually move everything!

Also, DO NOT help anyone else move (for instance, your brother!) in hopes that they will return the favor just out of the goodness of their hearts. Get it in writing!

Last but not least, if you plan to move, I suggest you have a place to move all your stuff to. Unlike me. Learn from my mistakes, will you?

There you have it. And now, for real, the good stuff.

Candied Ginger Bars
The bars themselves aren’t as gingery as a ginger cookie, but I figured if they were, it’d probably be a little too overpowering with the spicy candied ginger in there! Think balance =)

Ingredients:
* 3 Cups Flour (I used 1 Cup Whole Wheat Bread Flour, 2 Cups Whole Wheat Flour)
* 1 tsp Baking Powder
* 1/2 tsp Baking Soda
* 1/2 tsp Salt
* 1 tsp Ground Ginger

* 1/2 Cup Brown Sugar
* 1/2 Cup White Sugar
* 1/4 Cup Molasses
* 1/4 Cup Canola Oil + 1/2 Cup Margarine
* 1/4 Cup Almond Milk
* 2 Tbsp Vanilla Extract
* 2 Eggs

* 1 Cup Candied Ginger, minced
* 2 Tbsp White sugar or Turbinado Sugar for sprinkling on top.

Directions:
Preheat oven to 350* F and line or grease an 8×8″ square pan.

In the bowl of a stand mixer, cream together the oil, margarine, brown sugar, white sugar, and molasses. Add in the almond milk, vanilla extract, and the eggs, mixing well between each.

In a separate bowl, sift together the flour, baking powder, baking soda, salt, and ground ginger.

Slowly add the dry mixture to the wet mixture, mixing between additions. Scrape down the sides of the bowl periodically.

Stir in the minced candied ginger by hand.

Scoop the batter into the pan and spread it out evenly. Sprinkle sugar on top.
Bake for 20 minutes, then check. If it’s browning too quickly, turn the oven down to 325* and bake for 10 more minutes. Otherwise, just leave it at 350* and bake for 10 more minutes. Keep your eye on it!

Oh, and I’m just throwing this out there, but if you happen to see a girl wandering around campus occasionally, and it looks like she’s living in the library’s 24 hour Study Room and showering in the locker room…it’s totally NOT me. Definitely not. At all. =D